
This article shows one approach to installing an M31c Machine gun mount in your WWII Willys MB or Ford GPW Jeep


|
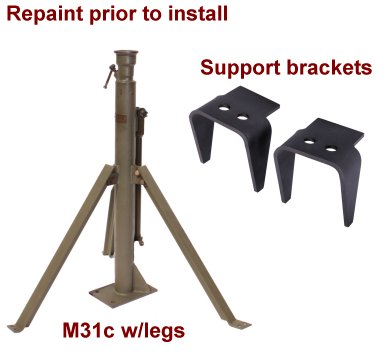
1. Buying an M31c machine gun mount can be one of the more exiciting additions to your jeep restore. This article will show you one approach on how to install it in your jeep. This mount was purchased from Army Jeep Parts and is the best reproduction mount made to date. |
|
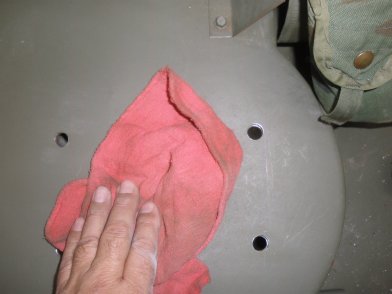
2. The first step before installing is to get the mount the correct color of your jeep. Be sure you have the mounting brackets that need to be welded to the frame for support, otherwise, your floor may get torn up from the weight. |
|
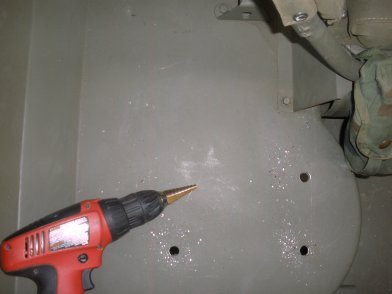
3. To start, your holes on the machine gun mount crossmember must be drilled. To gets these holes correct, start from the bottom, and center punch and drill the hole. Hole size will eventually be 1/2in diameter, but with my multisize drill bit, I will take it to about 3/8in, and finish from the top. You can easily drill out three of these holes from underneath. |
|
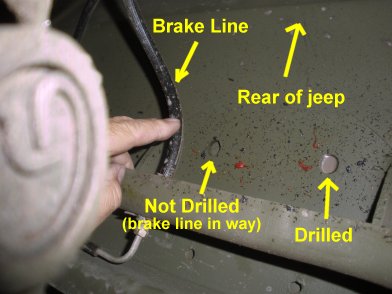
4. You can easily drill three of the four holes out from under the jeep, the forth hole is blocked by the brake line. So this hole will be drilled from the top and not from under the jeep. |
|
5. Before drilling the fourth hole out, finish drilling the holes out from the top to the 1/2in thread size. You want to place the mount over these holes and make sure they match up and that way you can mark the fourth hole for drilling. Again, a multisize drill bit makes this very quick and simple. |
|
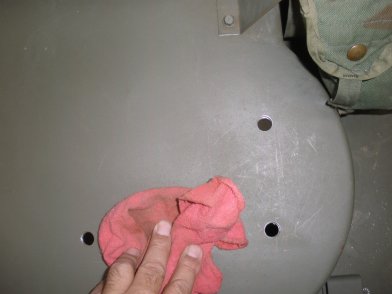
6. Clean and vacuum up the shavings before you place the mount on the floor. |
|
7. Place the mount on the floor and line up the holes. They should be just about perfect. |
|
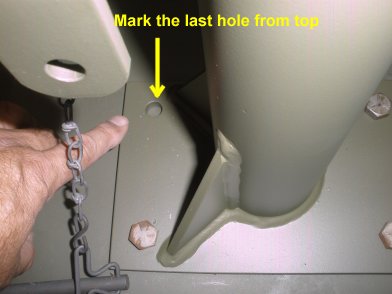
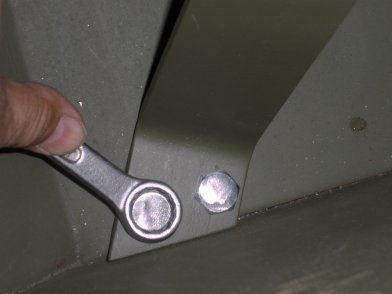
8. With mount lined up, place 3 bolts in the holes (to verify holes are correct) and mark the last hole to be drilled from the top. |

|
9. With the hole marked, punch a center spot so that you can drill from the top. This should line up perfectly. |
|
10. Now drill out that last hole, and it should be perfect. NOTE: becareful not to use a long drill here as you have the brake line underneath this spot. |
|
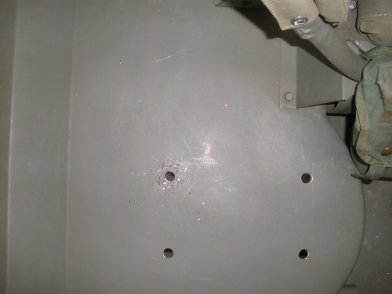
11. Clean and vacuum the shavings once again, and prepare to drop your mount back over the holes. |
|
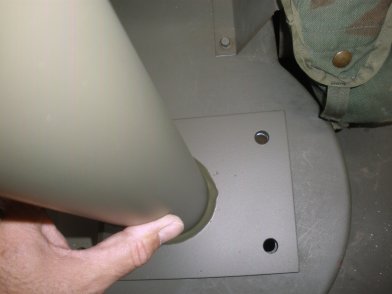
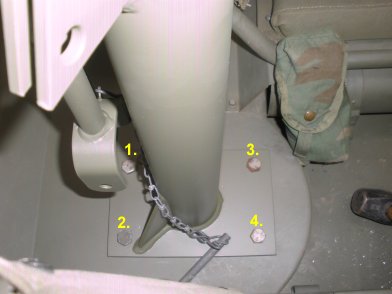
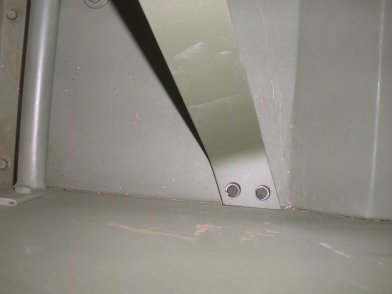
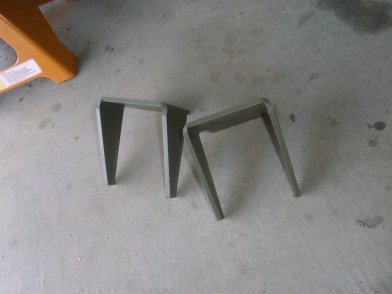
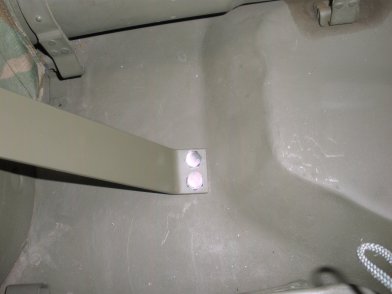
12. Now place the mount over the holes and drop in your 1/2in thread bolts and verify the fit. Should be happy with that result. Now on to the legs. |
|
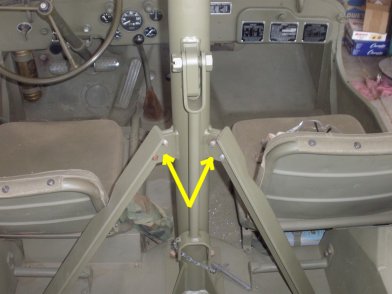
13. With the mount bolted in, now place the rear legs into the mount with a couple of 7/16in bolts holding them in place. You want to mark the rear floor for the holes that will be drilled out and attached to the brackets. |

|
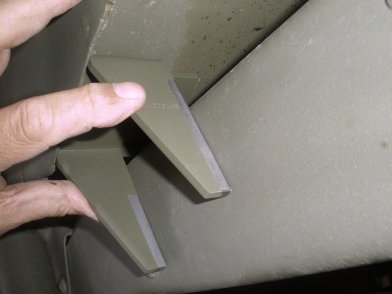
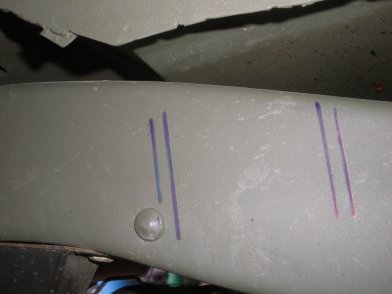
14. The rear legs should line up against your wheel wells on your rear floor. Take a marker and mark the holes on each side of the floor. |
|
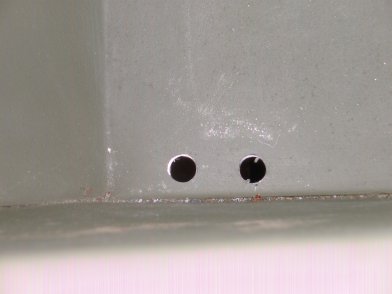
15. With the floor marked, drill out the four holes (two on each side). |
|
16. Put the legs back into the mount and see if the holes line up. If you want to test it, drop in a couple of 7/16 thread bolts. |
|
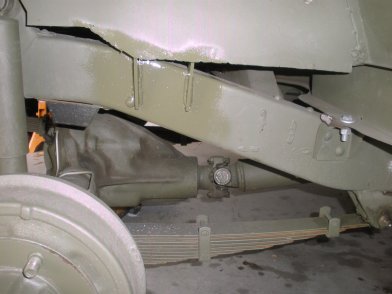
17. Now it is time to prepare to install the mounting brackets and weld to the frame. Jack up your rear of the jeep, and remove the rear tires. |
|
18. Here you see the mounting bracket lined up with the top holes in the floor. You will not that the brackets were prepainted, and steel is exposed where you want to weld. Now you want to mark the bracket on the frame |
|
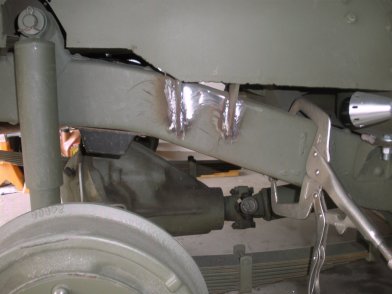
19. With the area marked on where the bracket will go, remove the paint on the frame with sand paper or a wire wheel. Tack weld the bracket in place, and verify that it is lined up with the floor and holes. |
|
20. If you are satisfied with the alignment, finish welding in the bracket. This will give your mount the designed strength needed to house your mount and gun. Now follow the same steps for the other side of the jeep for the next bracket. |
|
21. Wipe your welds down with solvent, and repaint the area. Be sure to get all of the area coated with paint. |
|
22. Now bolt in your rear floor legs and tighten up the legs into the mount and your almost done.... the front leg next. |

|
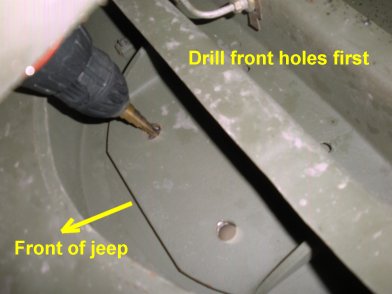
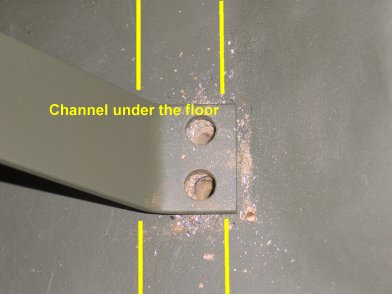
23. Now bolt in the front leg and prepare to drill out the front holes. Note: you will be drilling through your support channel underneath. |
|
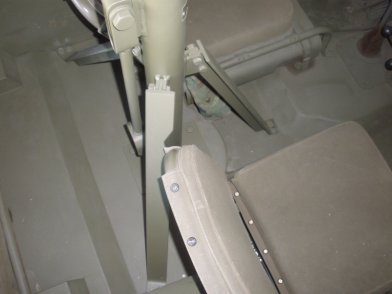
24. With the front leg down on the floor, push it toward the rear so the leg is snug. The closer the leg is the front tranny lip the less centered you are on the channel below the floor. If you have an orginal tub, you may not have much wood left, these channels where replaced on the floor during restoration so I expect the wood to be fairly clean. |
|
25. Once the holes are drilled out, you can bolt in your 7/16in bolts (note these are much longer than the others because you have drilled through the channel on bottom floor. |
|
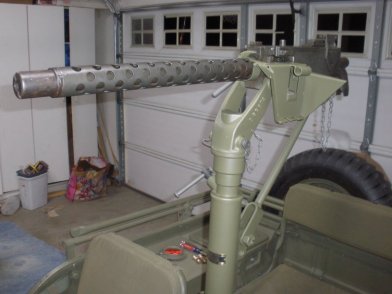
26. Now that the mount is installed, you can touch up the paint all around, bolt heads, dings around the area of installation and most of all... it should be nice and snug! |
|
27. The end result is a nice display of history! |
